Overview
After growing up surrounded by cars, I’ve grown accustomed to doing my own maintenance and repairs where possible. When I transitioned to EVs a couple years back, I expected that some repairs may require more manufacturer involvement than I was accustomed to. Unfortunately, due to Tesla being DIY Repair unfriendly, the situation was worse than I expected.
Even more unfortunate, the local service center has struggled to provide consistent quality service trapping me in between a rock and hard place. One prime example was when my 2014 Model S’ navigation stopped functioning properly. After almost nine months of back and forth & no resolution from Tesla, I decided that this would be a good opportunity to dig into the computer system to see if I could resolve the issue myself.
As I didn’t want to tear my car apart (yet) and I prefer to be comfortable while experimenting, my first order of business was to setup a test bench in my “mad scientist lair”. Having this would allow me to analyze the hardware and the physical & software interactions between the various modules used in the vehicle.
While there are numerous modules in the vehicle, my primary point of interest is the Media Control Unit. (MCU). The MCU is the main unit in the Model S and is the obvious analysis point for my navigation issue. The goal of this post will be to simply get the MCU up and running on your bench. In later posts, we’ll dive into more thoroughly analyzing it and other modules.
Step 1 – Getting Parts
In order to run the MCU on your test bench, we’re going to need a few things:
- An MCU! As it is unlikely you will have a spare laying around, acquiring this will be first on your shopping list. Acquiring directly from Tesla isn’t realistic, so you will be relegated to acquiring a used unit:
- eBay – For the older MCU 1 units, you should be able to find a good number of them here
- Car-Part.com – This site links you with salvage yards across the United States, Canada, and Mexico.
- Facebook / Social Media sites – There are multiple “Salvage / Part” groups where individuals are selling parts.
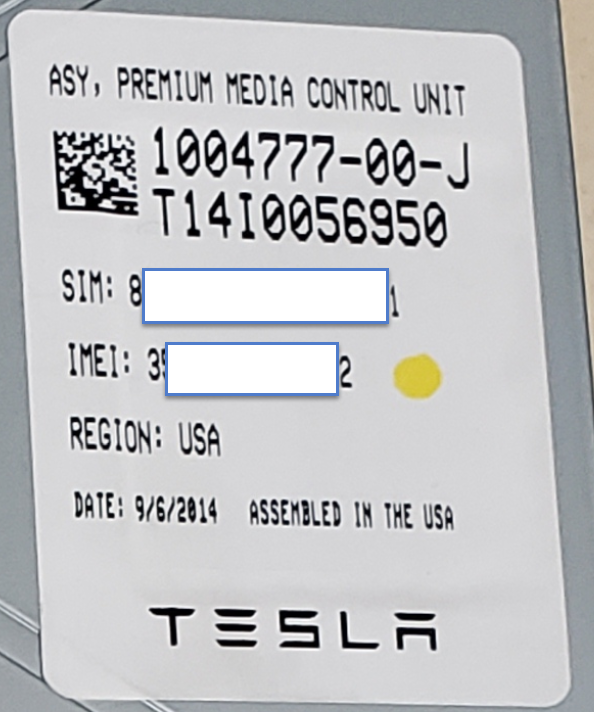
Tesla Premium MCU 1 Part No
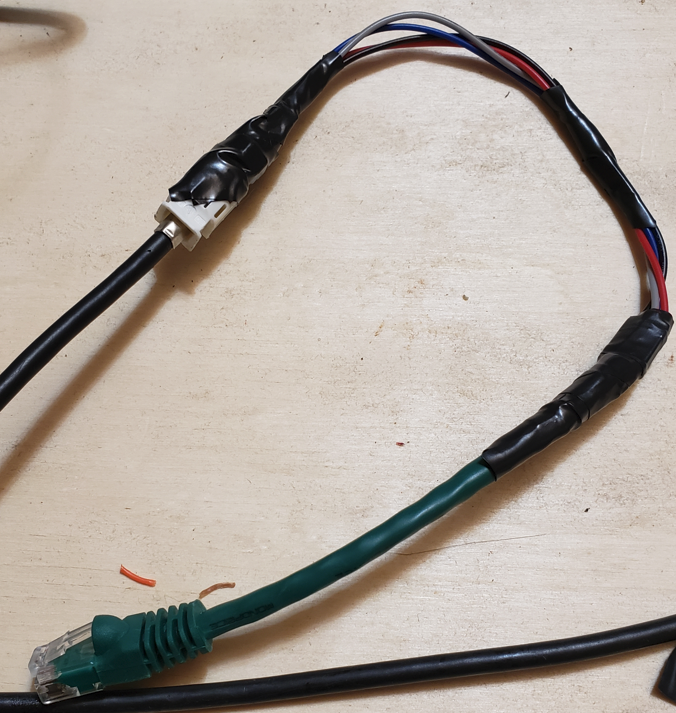
IMPORTANT: If at all possible, try to get the cabling/connects that plug into the back of the MCU. This will make life INFINITELY easier for you. At a minimum, you would want the connectors shown below for the “Premium” MCU 1 device:
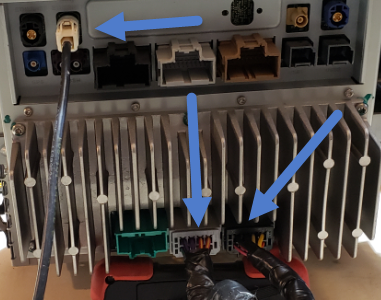
Figure 2 – Minimum Required Connectors
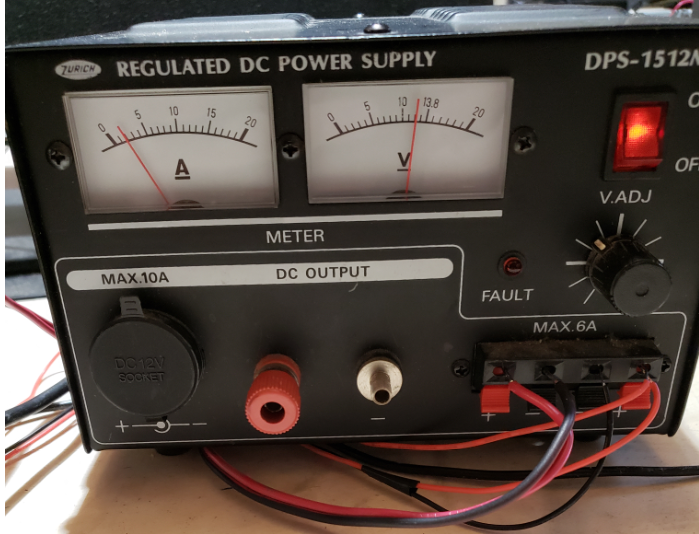
- Power – The MCU will require a steady 12V source that is capable of providing ~3 Amps.
- Soldering Iron – While not absolutely necessary, having a good soldering station will allow for a cleaner setup. I use the Hakko 936 which is a reliable entry level choice.

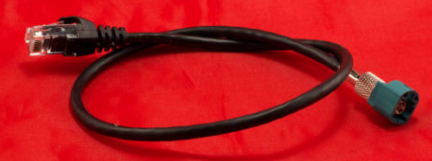
- Ethernet cable – A small Ethernet cable, that you won’t mind cutting up.
- Speaker – A small automotive speaker for connecting to the MCU to enable audio playback. This isn’t absolutely necessary, but it is a nice to have.

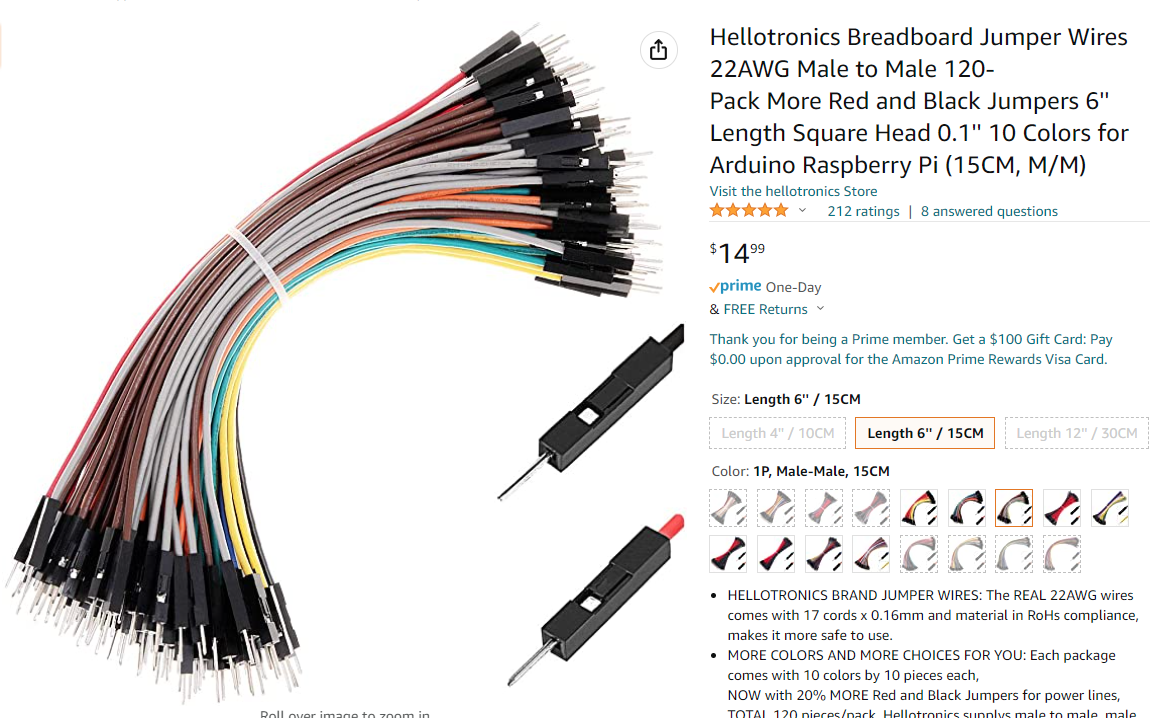
- Misc. Electronic Project cables / Jumper Cables – These will be used to create the Ethernet to Tesla MCU “Fakra” cable.
Step 2 – MCU Wiring
In order to get the MCU running on our bench, there are 3 three main items that we need to wire up:
- MCU Power & Ground : Required to provide power to the unit so that we can interact with it.
- MCU Speaker : Optionally recommended so that you can hear audio chimes and/or listen to music while you work. ☺
- Ethernet aka Fakra connection : Require so that we can startup the unit, access OS via telnet, or execute REST API commands.
MCU Power & Ground
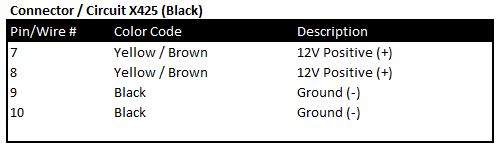
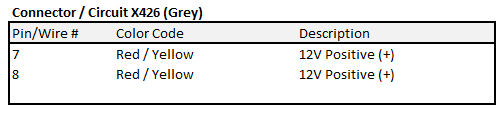
Wiring up the MCU for power is actually very straight forward and only requires a few positive (12V) and negative connections spread across two of the connectors. The two connectors are located on the lower portion of the MCU and are commonly referred to as X425 (Black) and X426. (Grey)
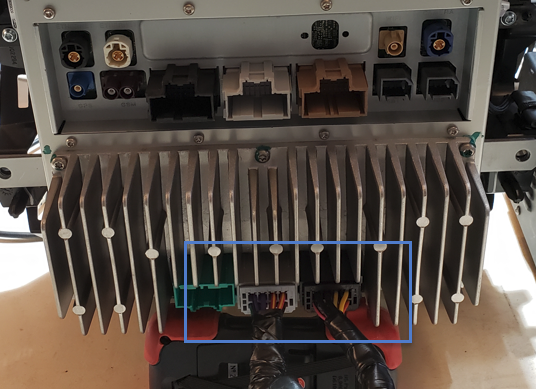
NOTE: In order to keep your wiring to the Power Supply clean, I recommend using a distribution block for + and – connections.
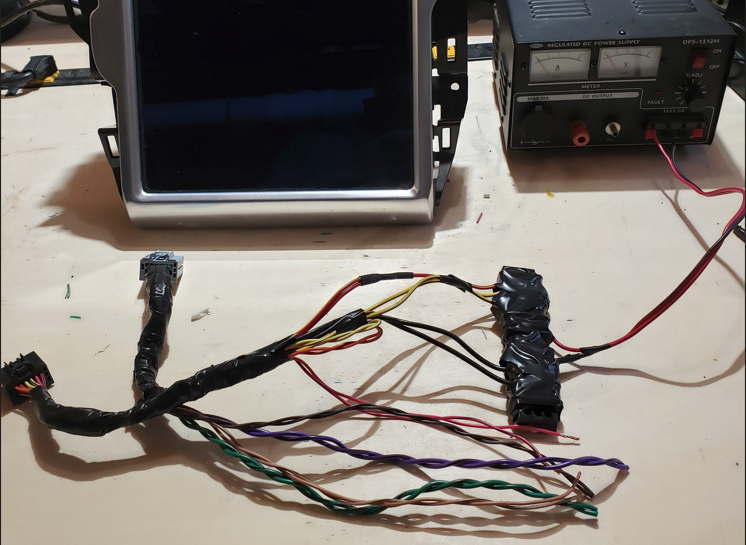
Close-up of necessary MCU power wiring connections.
MCU Speaker
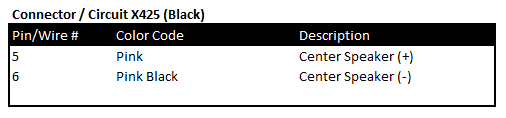
While you can wire up as many speakers as you would like, we only need the center speaker so that we can hear alert tones, etc. This speaker is also located on the X425 (Black) connector.
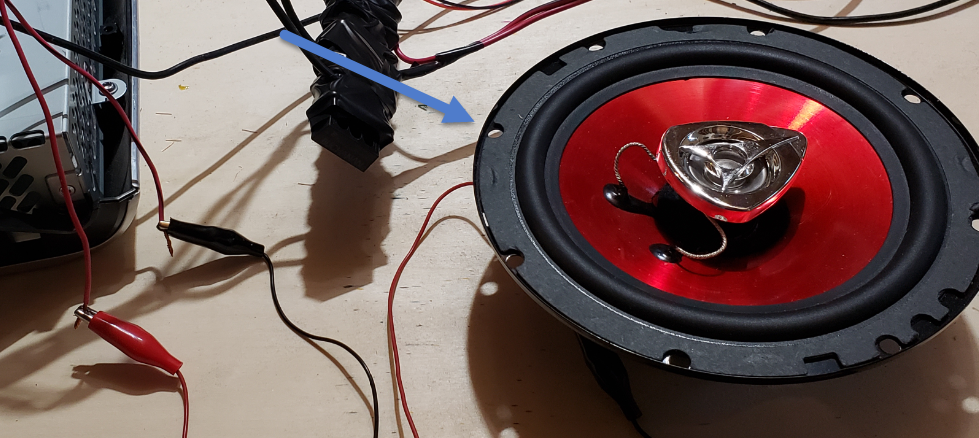
The easiest way to connect the speaker to these cables is to simply strip off the ends and use alligator clips:
Ethernet aka Fakra HSD connection
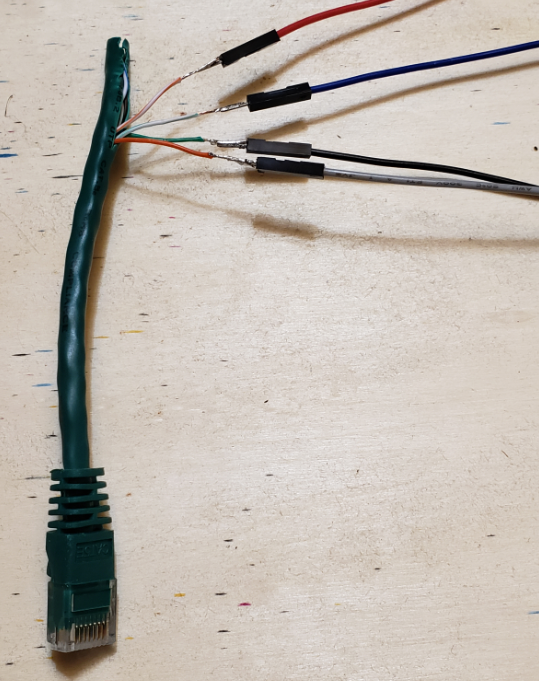
While the Tesla MCU utilizes Ethernet for certain actions, it does not provide you a convenient RJ45 port. The Ethernet connections utilize a “Fakra HSD” connector.
While you can buy these cables pre-made for ~$50, you can make one relatively easily once you know how to map out the HSD pins to the Ethernet cable wire.
The HSD cable consists of 4 pins consisting of two diagonal wire pairs where D+ / D- & Vcc / GND are pairs.
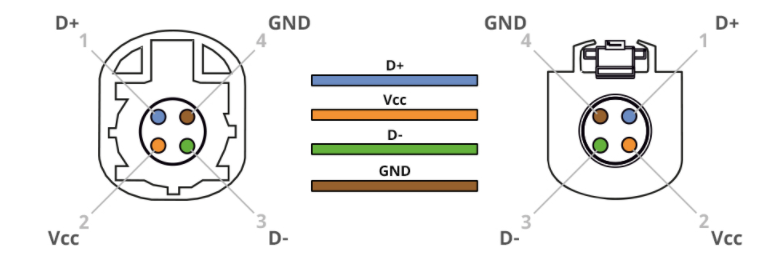
While a standard Ethernet cable consists of 8 wires / 4 twisted pairs, only 2 pairs are typically needed and these two pairs will be matched up to the HSD pinout as follows:
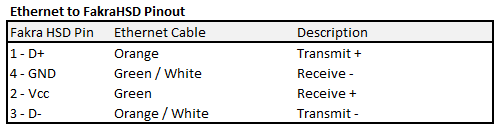
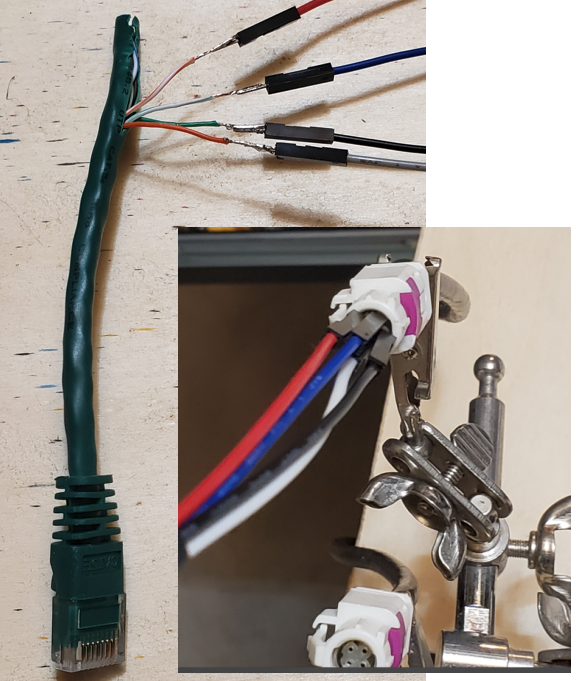
If making your own cable, the jumper wires I recommended at the start of this blog fit perfectly into the Fakra connector. I simply soldered one end to the Ethernet cable, inserted the other into the Fakra connector, and then taped it to ensure it doesn’t come loose.
Step 3 – MCU Startup
Once you have completed all of the wiring in the previous step, you are ready to start the MCU! Next, perform the following actions:
- Ensure that you have connected your positive and negative wires to your power supply and that the power supply is set to a 12V output voltage.
- Ensure that your speaker is connected.
- IMPORTANT: Plug the Fakra/Ethernet cable into the back of the MCU and into either a network device (Hub/Switch) or to a laptop. Even if the MCU has power, it may not fully start unless it sees network traffic. [There are other ways to force it to start, but this is the easiest]

- Turn on your power supply – You will notice that at first, it is drawing a relatively low amount of amps, but once it fully starts, you will see the draw increase.
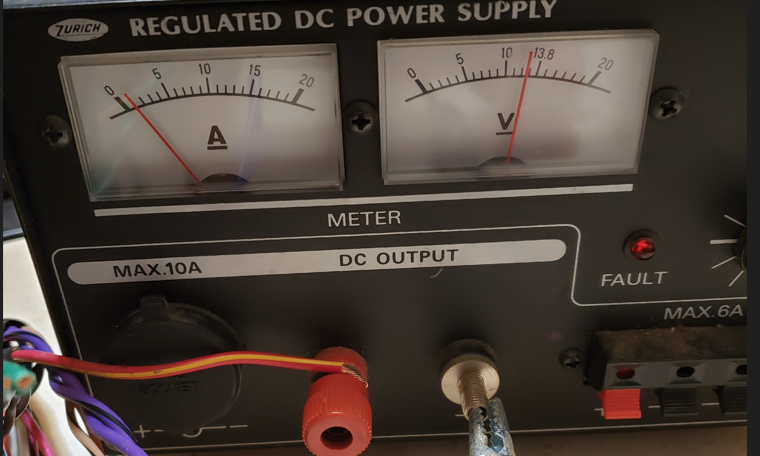
- Verify that MCU has power – If you look at the right side of the unit, you should see multiple LED status lights. Initially some will be Yellow/Red. Some will turn green as unit boots, etc.

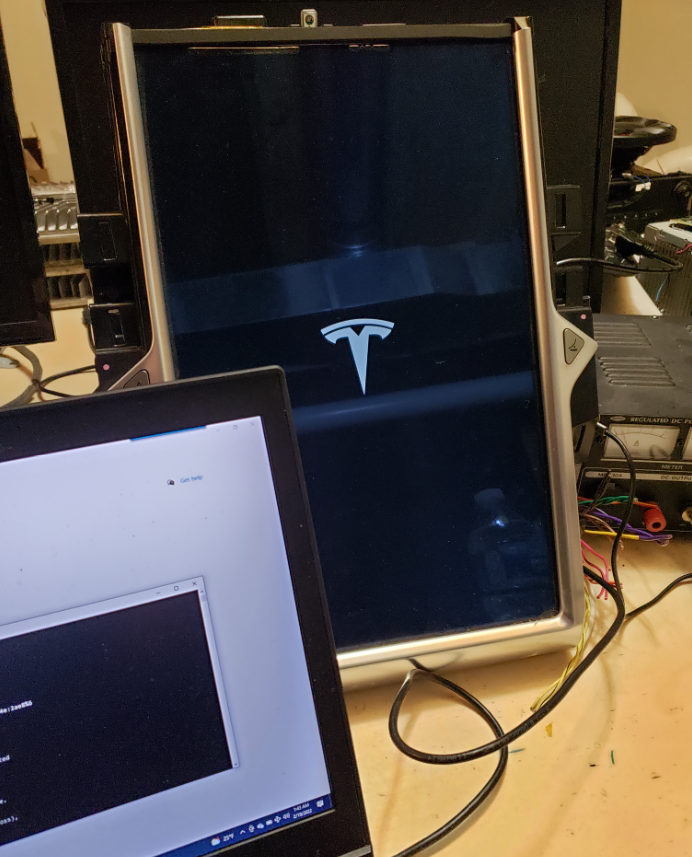
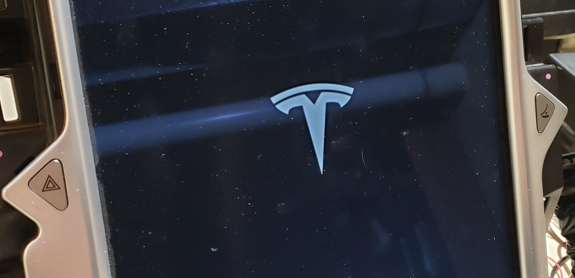
- Wait…. Wait…. Wait… It should take ~20 – 30 seconds to full boot up. If you have the speaker connected, you SHOULD hear a series of chimes around the same time the Tesla ‘T’ appears.
- Wait… Wait… Wait some more and then you should finally see the MCU come to life
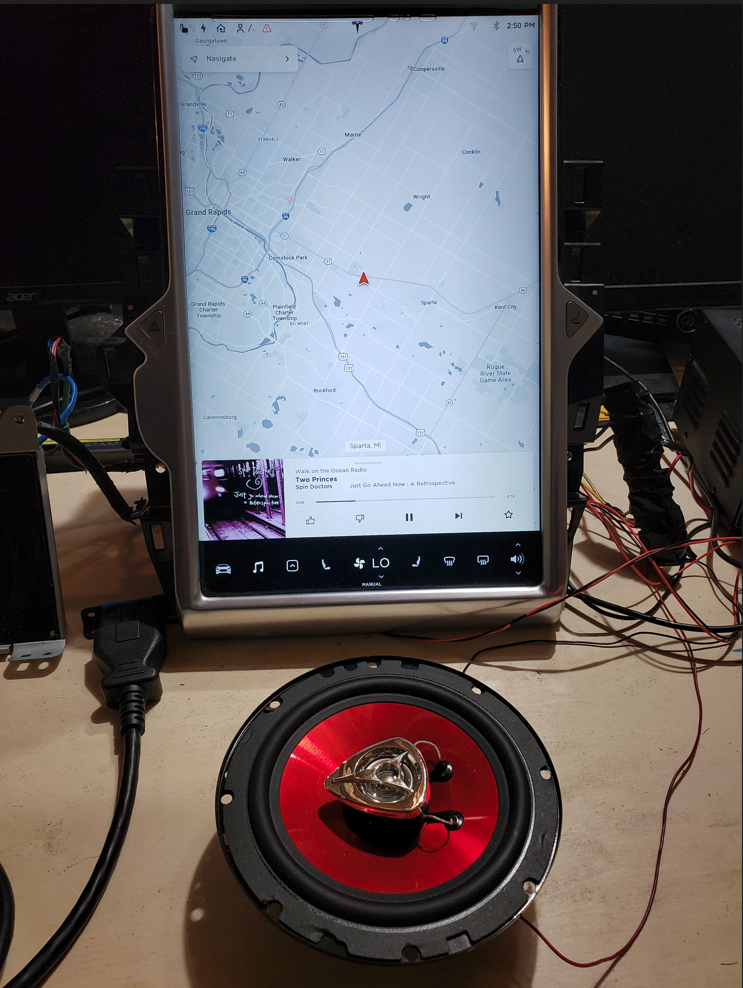
Congrats! You now have a functional MCU on your test bench!